I found this little wood crib when I was browsing at the thrift shop recently.

It was a little rough around the edges. And it had some dried paint blobs here and there.

So with my sander, I got to work and smoothed out all the edges and the wood "pokies". I don't want little fingers to get splinters.
Not pretty at this stage, but smooth as a baby's bottom. Next, a coat of white primer.

I had some leftover pale pink latex paint that we used when we redid my daughters room. It is a beautiful, blush pink and not a color she would normally choose. At 15 years old, she is more into lime green and teal colors. But she fell in love with a gray and pink bedroom she saw on Pinterest and I love how her bedroom came out. Luckily, I had lots of pink paint left over.
I wanted small little rosebuds decals placed on the front of the crib to make it seem more vintage-y. I did a Google search for small pink rosebuds, but couldn't find exactly what I was looking for.
Then I remembered this scrapbook paper I got from Hobby Lobby. It had the perfect size little roses.
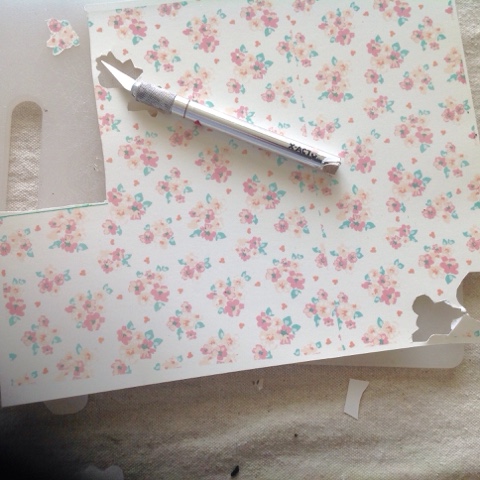
And I had this inkjet decal paper bought on Amazon.

I placed the decal paper in my printer paper tray and copied the scrapbook paper onto the glossy side.
The ink on the decal paper is very wet when it comes out of the printer. It would easily smudge if touched. I set it aside for 30 minutes. After it dried, I gave it a light coat of Krylon Matte Finish Sealer. When that dried, I gave another light spray. Since it was already evening when I was doing this, I gave it one more final spray of sealer before I went to bed and let it set overnight. Three coats of sealer may be overkill, but I'd rather be safe then sorry.

The next morning I cut out several little roses with an Exacto knife. It's important to cut as closely to your image as you can.
I put a decal in a bowl of water for a few minutes until the papers separate. Then I placed it on the wood and pressed gently with a soft, dry cloth. When I was finished with the decals, I sprayed 2-3 coats of sealer on them to make sure they stay put.

A little Annie Sloan clear wax was applied everywhere, except the decal area.

And now when it's nap time, Avenleys baby has her own special little place.


No comments:
Post a Comment